
Tuesday, August 9, 2011
etching... update
Wednesday, June 15, 2011
Ideas in Progress... Etching
So we came across this thread in chop cult awhile ago which made brass etching look easy.
 There are some kinks to be worked out, but not bad at all for two test pieces. Apparently we need a different laserjet printer(Brothers use a type of toner that don't melt well), and using PnP or something similar will make for less porosity in the resist. As far as projects go though, this was relatively painless and just needs a bit more practice.

Saturday, June 4, 2011
Never say Never
Sorry it's been way too long updating my blog, things have been more than a little busy around the shop. One of the main things that has been occupying my time has been finishing up, sell, shipping etc, the "Last Streetfighter".

So while I was building the last Streetfighter, I told myself that it would be the last one I build for awhile, at least a year or so. I have built this same bike about 5 or 6 times in a row, and need to build something different, to get the creative juices flowing again. I am not saying that I don’t like building the Streetfighter, or the last bikes were below par, I just need a change. And on top of that I have the next two bikes lined up, staring at me while I have been working on the last Streetfighter. One is a Triumph using an aftermarket frame, and the other is a ’50 pre-unit. I have some interesting ideas about both of them, and really want to get started on them.
And then this followed me home the other day. ’73 Triumph 750cc 5 speed.

It was one of those deals that was too good to pass up. I really didn’t want to buy it, but my smarter half won out. The plan was to build an entry level streetfighter; something a bit more economically friendly. I have had great response from the last couple of bikes, but I also know that the economy has not been to kind to everyone; this bike would have the same quality of fabrication, and parts I use on all of my bikes, the only difference is that it won’t be subjected to the uber-OCD finishing that usually happens. Without the said uber-OCD finishing, it would take less time, and I could get a jump on some of the other projects I have lined up. So I had started the standard hard tail fab and had the motor mostly pulled apart; when I got a call from a guy who loves the streetfighter, and has claimed this one for himself. He is a great guy, and is doing a few upgrades on it. So this is now "The Last Streetfighter"........ again............ maybe.........for awhile.
Sunday, March 27, 2011
Oil filter and lines...

This street fighter is finally coming together. Since this bike is running without a battery, I decided to tuck the oil filter behind the motor. Its funny that the oil filter is one of those elements that can make people love or hate my bikes. I think leaving them bright orange is a slightly industrial, utilitarian touch that reminds people that the bike is more than really expensive sculpture, and should be ridden.
That, and the fact that changing them is as simple as getting a different colored filter, getting an oil filter cover, or painting it, which is the option I'm going with this time. The point of tucking it behind the engine is to make it a bit less obtrusive, and play with the shape of the oil lines.

Lesson learned from copper prices going up: copper tubing has more grades than it used to. On the right is the cheaper stuff which should not be used for running any sort of line with a bend in it. I picked up a batch by accident, and it was thin, brittle, flattening on bends, and all around junk. On the other hand, it was perfectly serviceable for mocking up a few different options, and cheaper then screwing up on the much better stuff on the left. Good copper tubing should be heavy, soft, and hold its shape well when bending. Apparently it also costs near twice what it used to.
I use flare fittings. Compression fittings are generally meant for stationary, one time use; and when it comes to a solid oil line, using something that is more reliable when under stress and vibration, and rated for fuel systems is a a good idea.


Standard mount on the left; current oil lines on the right. A bit cleaner and perhaps graceful?
Wednesday, March 16, 2011
Fixed, Properly
This is a follow up to the earlier post on what happens when you don't install a wrist pin clip properly. Well, thanks to a friend of mine, Adam, the bike now has a 750cc big bore kit, new pistons and rings. If you do things properly it should look like this:

Installed:
 Here they are in their new home:

And speaking of doing things properly, this is what a sludge trap should look like when you start to put it back together. I really just added this picture because I like the dramatic lighting.


Installed:


And speaking of doing things properly, this is what a sludge trap should look like when you start to put it back together. I really just added this picture because I like the dramatic lighting.

Saturday, March 12, 2011
Powder coat
 | |||||||
| Like baking, but with the added bonus of strange chemical smells. |
 | |||
| As long as you clean thoroughly, sandblast and pre-bake, powder coating is pretty cut and dry. |
 |
| That, and the worst that can happen is starting over. |
Tuesday, March 1, 2011
seat rivet spacing

2: figure out where the leather is going-black
3: figure out how far from the edge your rivets will be, and where the centers are, draw a line that will pass through the centers of all the rivets will be(yellow line)
4: measure the circumference of your your rivet spacing line(use flexible ruler or string)
5: figure out approximately how far apart you want the rivets to be, based on thickness of material, rivet size, and visual effect (the leather we use is over 1/4" thick, and the rivets are something like 1/2" copper). Divide the circumference by this spacing to figure out how many rivets you will have, and adjust the spacing until it divides fairly evenly.
6: using circles with the same radius as your rivet spacing, start with center right point, use the intersection of the circles with the rivet line to figure out where your rivets will go. -green
7: curse as you make small adjustments and redo the circles 2-3 times in order to get spacing perfect. make sure the rivet placement works with the bend in the seat.
notes:
-Mocking it up on the computer makes it a bit easier to play with small circle adjustments, but the set up is exactly the same for using a compass and doing it by hand.
-note that this is visually even rivet spacing, which means that the straight line between each rivet is the same. For true even spacing on a curve, use a flexible curve ruler and do it by hand, if you have lots of rivets/tight curves, this may or may not look better.
-your life will be 10 times easier if you drill the holes before you bend the seat pan.
So the latest bike I bought was from a "Master Machinist", and it was his baby, so you would expect thing to be in fairly good order. When I picked up the bike it ran well enough, no strange noises, no bangs or chunks, nothing out of the ordinary, which is to be expected since he said he rebuilt the motor 300 miles ago. So I tear into it the other day and found this:

Evidently Mr. "Master Machinist" could not put a wrist pin clip in properly and destroyed both the cylinders and pistons, to the point that I don't think over boring will save them. They will probably need to be re-sleeved. Awesome!
BTW the pictures make it look better than it really is.

This is why I do a complete tear down and rebuild of every motor, and so should you.
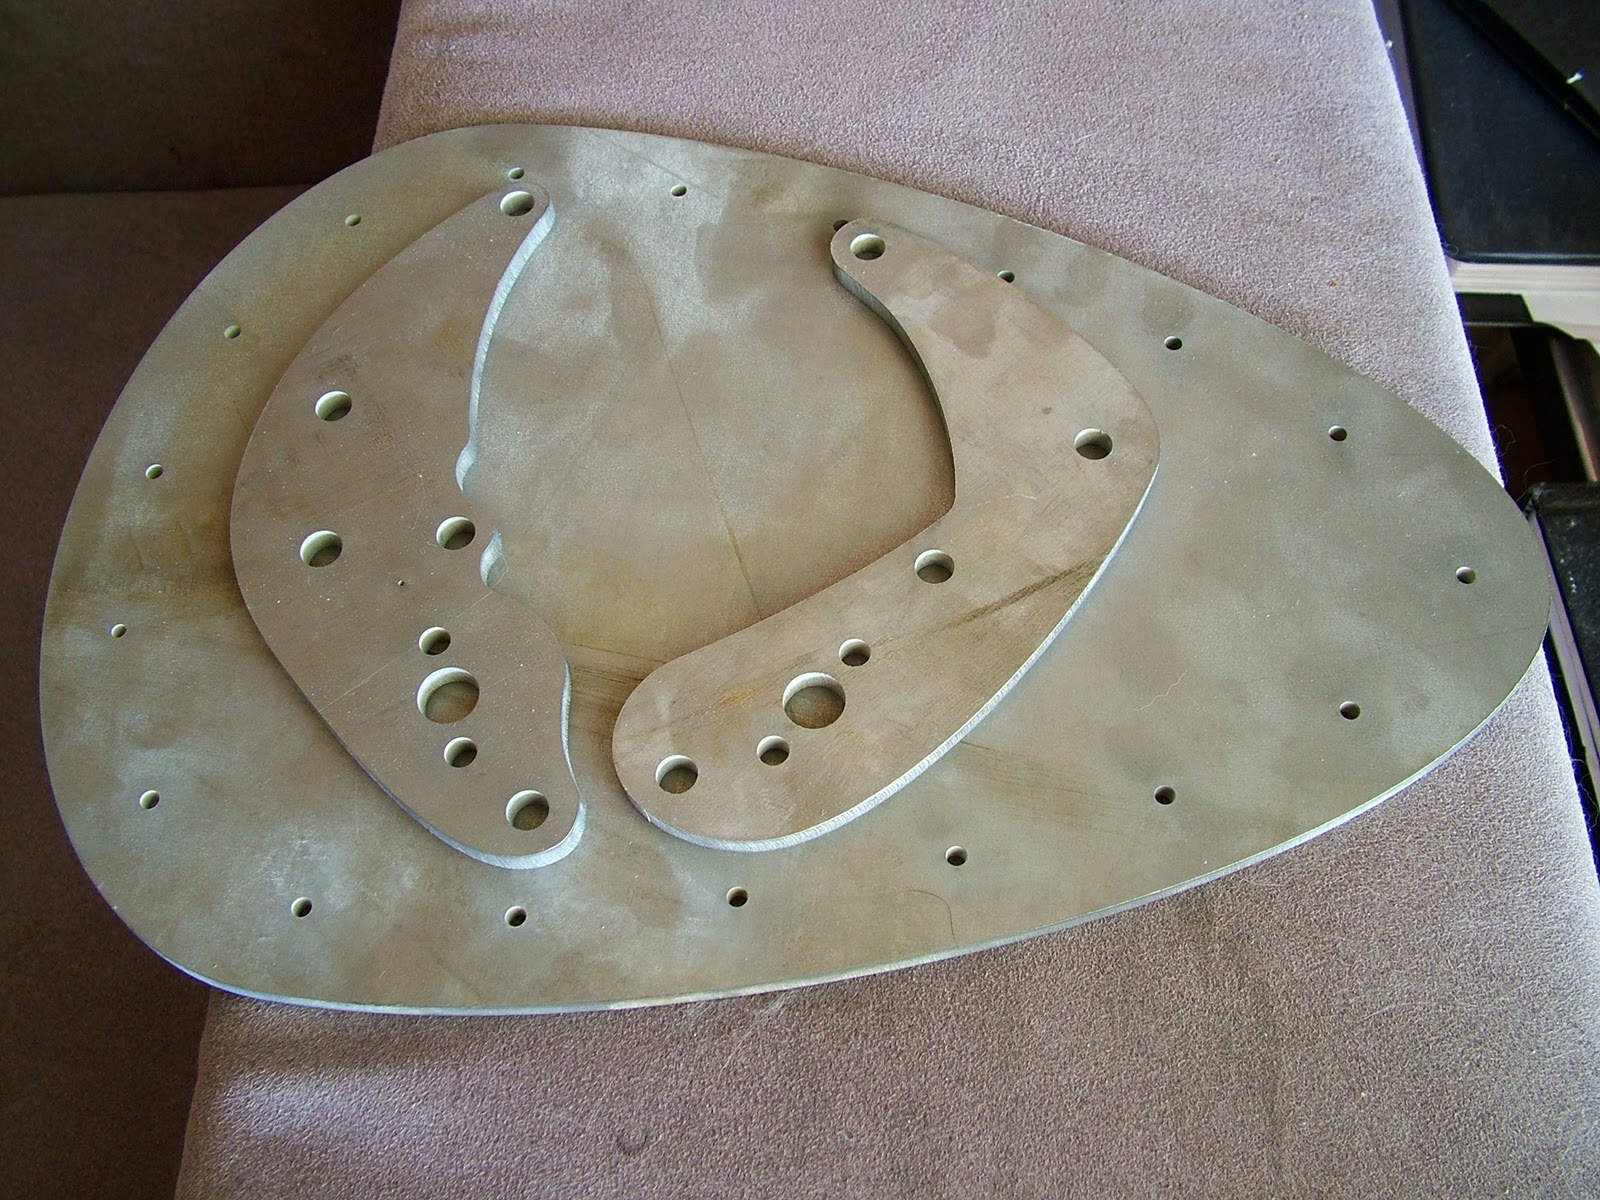
water jet parts...2.0
 We are on our third or fourth run of water jet parts now, and things have changed slightly. The stock axle plate(black) has been pretty much replaced with the modified, which gives us a little more drop and play in for the OIF frames, for regular Triumph frames, it would rally be a matter or personal preference. In addition, the quality of our parts has gone up, meaning all the cutting lines have been cleaned, the parts have been generally deburred, and the cutting speed itself has been slowed down to avoid drift in the 1/2 inch plates. Which means the price has gone up slightly, but the prep work has gone down significantly.
As far as the motor mounts go, its been a process of slight adjustments with each pair cut, and at this point they are near perfect. The whole "patented anti-queef" is a bit of a joke, but between the 1/4" thickness and the bottom mount, they are rock solid and well, anti-queef.
The seat pan in the background is for now un-orderable, since its cut from 3/16" steel that makes it rather unwieldy for most people to bend. If you have something else in mind and need a thinner custom blank cut, let us know.
Wednesday, February 23, 2011
In Progress..and for sale!


This is is the current street fighter... It is a 72' Triumph OIF, 5-speed with a 750 big bore kit, completely rebuilt motor. Hard tailed with a approximately 5"stretch, 3 inch drop.
Electronic Ignition, and the rest of our standard works package. We are in the process of buttoning up the motor, powder coating, polishing case covers, picking out a paint scheme, and the rest of the fiddly bits.
Clean and clear title, custom anti-queef motor mounts, un-lucased wiring, etc, etc. Magical battery-less system, clip-on handlebars, you get the picture.
Interested? Want to be able to specify things like paint, seat, type, handlebars, and exhaust? Let us know.
Subscribe to:
Posts (Atom)